This is an old revision of the document!
Configuring Session (Login Dialog)
To configure your session, start WinSCP, and then use the Login dialog that opens. It can be invoked also later to open additional sessions.
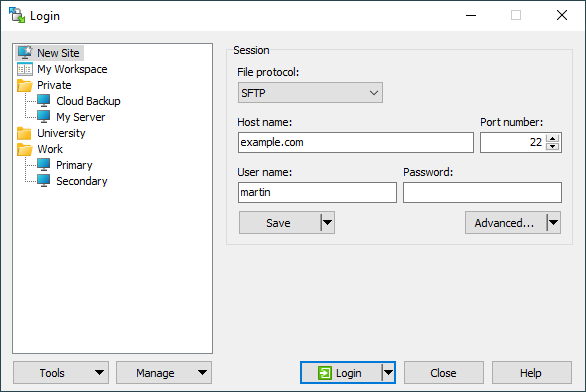
Login dialog also shows automatically on startup and when the last session is closed, by default. You can turn that off by unchecking the Show Login dialog on startup and when the last session is closed checkbox. You can revert that in preferences.
Advertisement
Creating Shortcuts
Use Manage > Desktop Icon command to create a Desktop shortcut icons for selected site, site folder or workspace. For sites you can create also 'Send To’ shortcuts.
Note that if you delete the site the existing icons will not work anymore.
Renaming
Use the Manage > Rename command to rename selected site, site folder or workspace.
Advanced Functions
Opening Site in PuTTY
You can open configured session, the selected site or all sites in the selected folder in PuTTY SSH client instead of WinSCP. Use Manage > Open in PuTTY command.1
Advertisement
Opening sessions that require an SSH tunnel is not possible this way. You have to first open the session with the tunnel in WinSCP and only then open the session in PuTTY.
Default Session Settings
Use Manage > Set Defaults set configured session settings or settings of selected site as default session settings.
Pasting Session URL
Use the Manage > Paste Session URL or Ctrl+V to paste a session URL from the clipboard. It gets parsed into File protocol, Host name, Username, etc. The command is available only for New Site node or when editing site.
Generating Session URL or Code
Use the Manage > Generate Session URL/Code to open Generate Session URL/Code dialog for selected site.
- Hold down
Shiftkey to open the site in PuTTY without closing WinSCP Login dialog.Back